
Contributing to Helioviewer
Helioviewer Development - Getting Started Guide
Daniel here, as one of the newer members to the Helioviewer Project, I’ve put together this guide for setting up a development environment and using git to make pull requests to help with onboarding any future contributors we may have.
This page is here to describe the process for setting up a local development environment that can be used for testing changes for https://helioviewer.org. This document also goes over setting up a branch on GitHub for making pull requests, which you may skip if you’re already familiar with git and the pull request process. If you have any questions about the steps here, please let us know by emailing contact@helioviewer.org so we can update these steps.
In Summary, this page will go over:
- Forking helioviewer on GitHub
- Cloning the project locally
- Setting up the development environment with Docker
- Guidance on the general workflow (branching, pushing, and pull requests)
If you’re already familiar with GitHub and git, then you’ll most likely just be interested in section 3 on setting up the local environment. All other sections go over how to use GitHub to fork our repositories, clone the project, and make a pull request. If you know how to do these things already then you can ignore these sections. If you’re new to GitHub and git, I recommend going through all sections.
1. Fork Helioviewer
If you haven’t worked on Helioviewer yet, you’ll want to start here. In this section, you’ll make your own copies of the helioviewer.org repositories on GitHub that you can use to make pull requests later on. You’ll need to create a GitHub account which is not covered here.
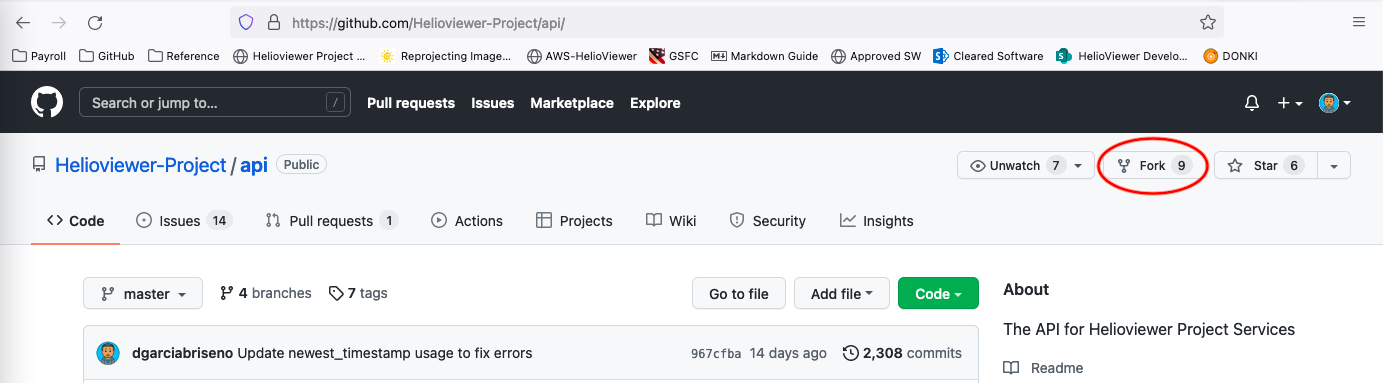
Once you have an account, log in and go to the API Page and click fork in the top right corner (See images below). After forking the API, create a fork for the helioviewer.org repository as well.
After forking, you should see the api and helioviewer.org on your GitHub account in your repositories list. Like this:

2. Cloning Helioviewer
Next, you need to clone your forks to your computer so you can make changes and test them there. I’ll do this with Github Desktop since it’s very user-friendly, but if you’re already familiar with Git, feel free to use whatever tools you’re comfortable with.
- Download Github Desktop.
- Sign in with your Github credentials and authorize Github Desktop.
- Github will ask which email you want to use, select the Github email and continue
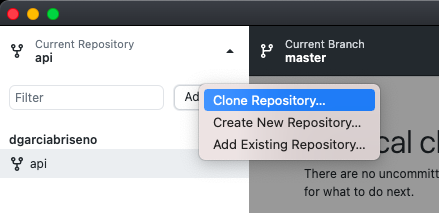
- Next, click “clone a repository from the internet” and clone the API you just forked, save the path you clone it to as you’ll need it for later steps.
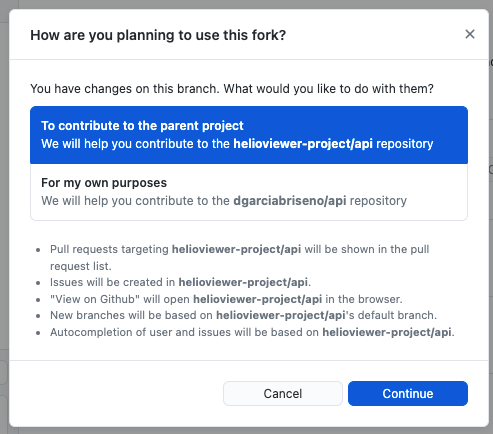
- Tell Github you would like to use this fork for contributing to the parent project.
- Click the sidebar to clone another repository
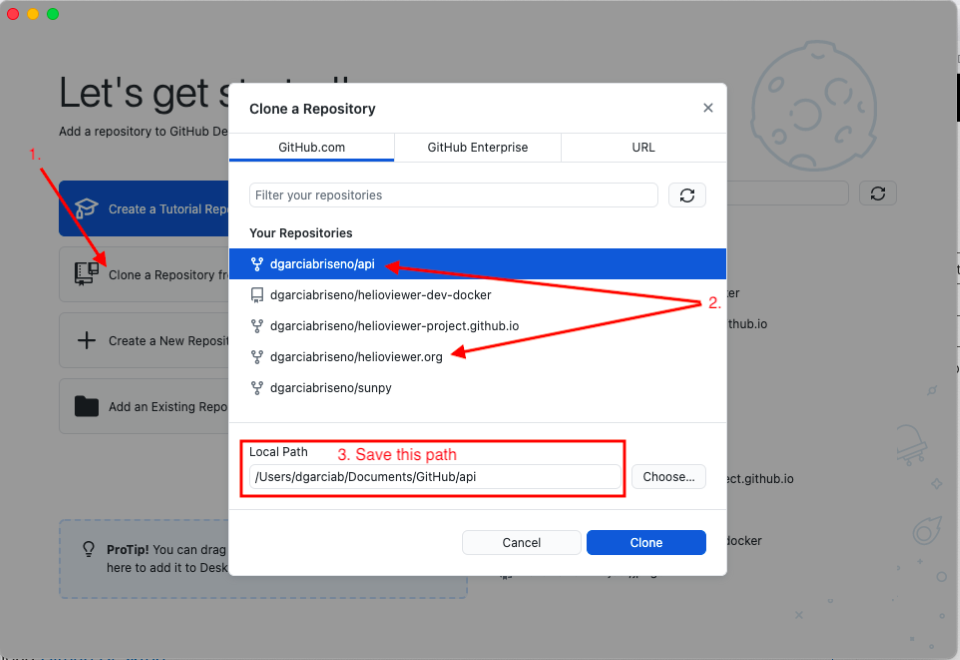
Repeat the steps to clone helioviewer.org as well.
3. Setting up the local environment
Great, now you have your own copy of helioviewer on Github, and on your computer! Now you’re ready to run the application yourself. To do this, you will need Docker (or podman if you’d rather not use docker). The instructions that follow are for Docker.
A container has already been set up to manage a lot of things for you. The Helioviewer development container will automatically download images, delete any images older than 1 day (to conserve space), and configure your local copy of helioviewer for running on localhost.
To run the container, you’ll need the paths to your API and Helioviewer.org repositories that you saved in step #2.
Select the command below based on your environment (windows cmd, windows powershell, mac, or linux). Execute the appropriate command in your desired terminal.
For Windows Users (cmd.exe):
cd C:\Path\To\Github
docker run ^
  -p 127.0.0.1:8080:80 ^
  -p 127.0.0.1:8081:81 ^
  -v "%cd%/api":"/var/www/api.helioviewer.org" ^
  -v "%cd%/helioviewer.org":"/var/www/helioviewer.org" ^
  -d -t dgarciabriseno/helioviewer.org-docker:v1.4_setup_done
Also windows if using powershell (PowerShell.exe):
cd C:/Path/To/Github
docker run `
  -p 127.0.0.1:8080:80 `
  -p 127.0.0.1:8081:81 `
  -v ${PWD}/api:"/var/www/api.helioviewer.org" `
  -v ${PWD}/helioviewer.org:"/var/www/helioviewer.org" `
  -d -t dgarciabriseno/helioviewer.org-docker:v1.4_setup_done
For Mac/Linux users:
docker run \
  -p 127.0.0.1:8080:80 \
  -p 127.0.0.1:8081:81 \
  -v "/Path/To/API":"/var/www/api.helioviewer.org" \
  -v "/Path/To/helioviewer.org":"/var/www/helioviewer.org" \
  -d -t dgarciabriseno/helioviewer.org-docker:v1.4_setup_done
For details on the above command, see the Docker run reference
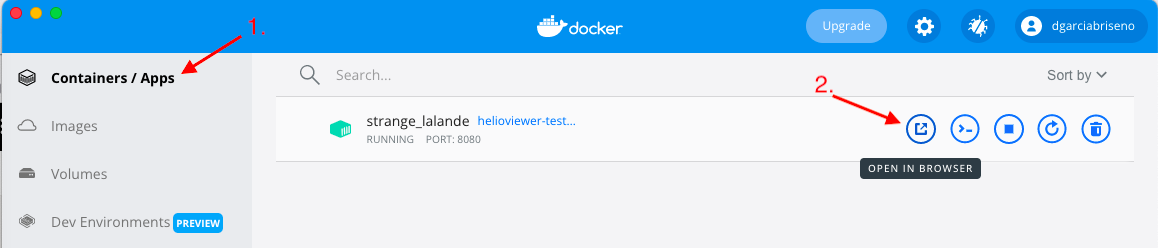
Now verify the container is working as expected. In docker desktop go to the Containers / Apps tab (see image below). You will see that it created a container. Next click the open in browser button to see Helioviewer running on your computer, complete with images of the sun! By default the container’s pre-installed images are in December 2021, don’t worry, in a few minutes you’ll be able to jump to today’s date and see the latest AIA images of the sun.
If the UI doesn’t work, or you just get a blank white screen, or you see the helioviewer UI, but no sun, please open an issue on the container’s github page for assistance.
4. Development Workflow
Now that you have a local copy and development environment for Helioviewer. You’re ready to start modifying the source code. A typical workflow for Helioviewer looks like this:
- Create A New Branch Based on Beta
Beta contains the latest development changes, so all new changes should be branched from the latest commit on beta.
- In GitHub Desktop, click the branch tab an select that you want to checkout upstream/beta.
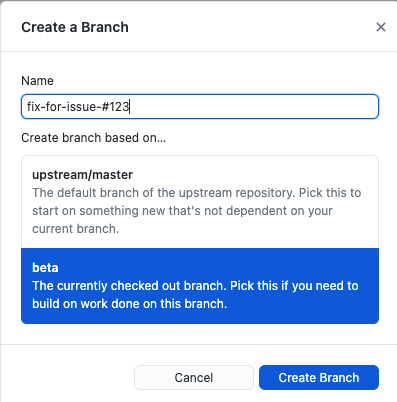
- Next select “New Branch” and select that you want to branch off “beta” Enter a name for your branch, this can be whatever you want. Something like “fix-for-issue-1234” or “update-xyz” This name is for you to know what code you have on this branch.
Next you can make changes and test them in your container. When testing javascript or CSS changes, use the URL: https://127.0.0.1:8080?debug=True
The ?debug=True will tell Helioviewer to use non-minified
CSS/JavaScript.
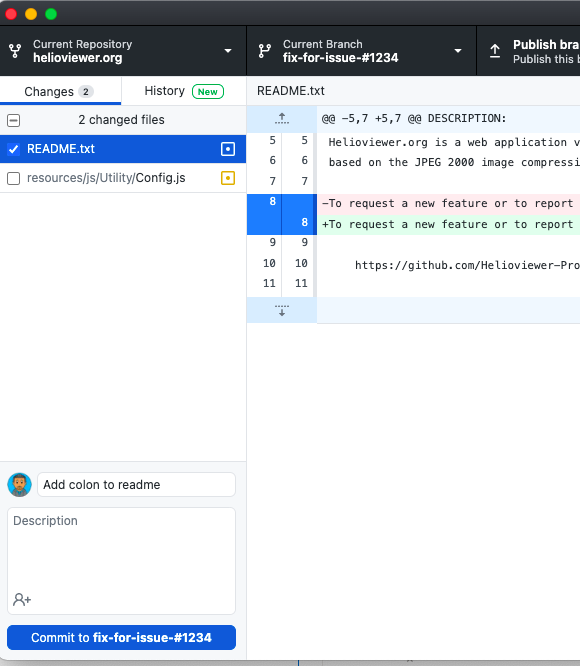
After making changes you can commit them with GitHub desktop. The left sidebar will show files you have changed. Please uncheck changes to Config.js. The container modifies this file for running on localhost and should not be committed. Generally you should commit often with descriptions of what you did in each commit so it’s easy to rollback a change if necessary.
Once a change is ready to submit to helioviewer, you can make a pull request after you publish your changes to GitHub. Use the “Publish branch” button in GitHub desktop to push your changes to your GitHub fork. You can do this as often as necessary. When you’re ready to submit a change to helioviewer, you’ll need to make a pull request.
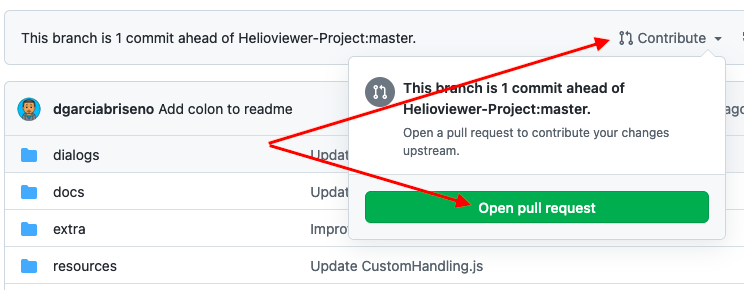
Sometimes GitHub will have a message on top for “Compare & pull request” If this doesn’t show, you can make a pull request like this:
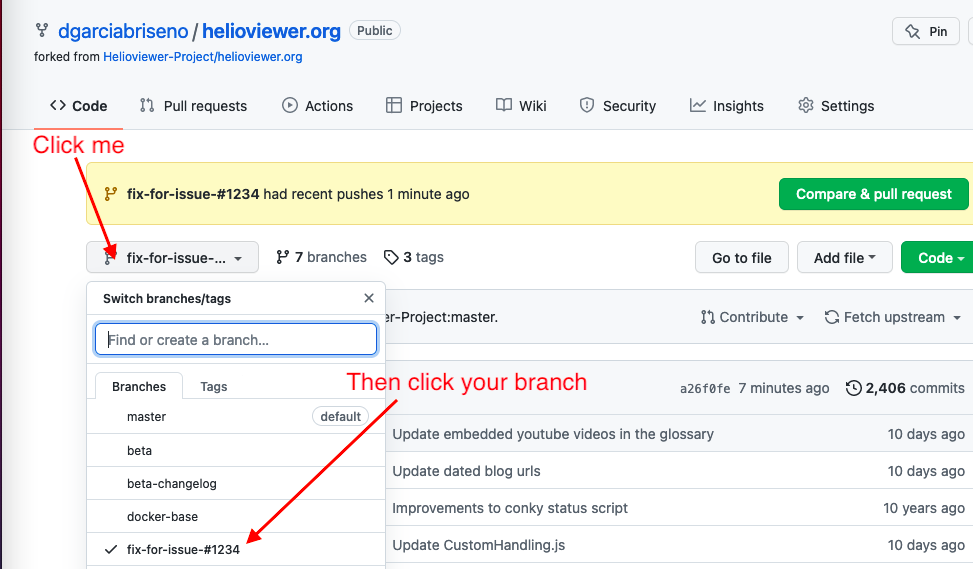
When making a pull request, set the target branch to beta. Then update your commit message to mention the change you’re making.
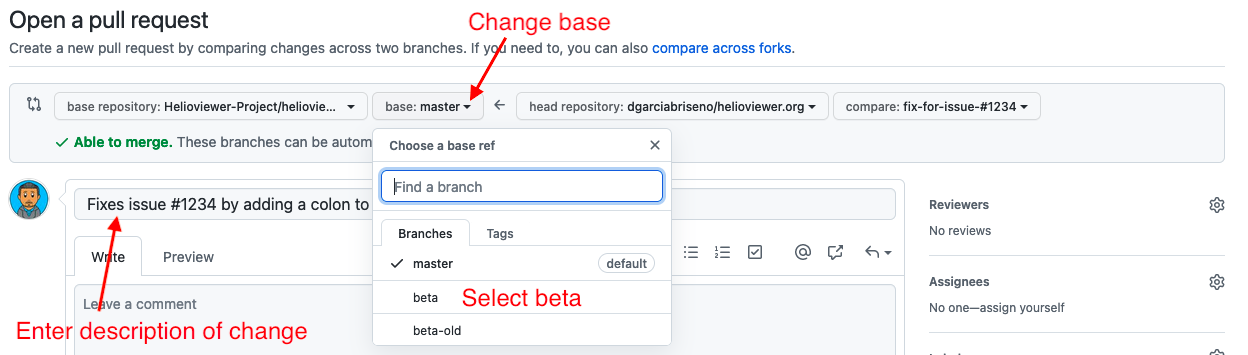
Lastly click “Create a Pull Request” and we’ll review your change.